
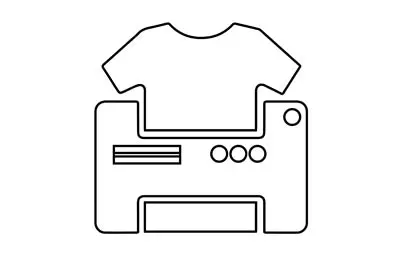
Stencil Printing
Get creative, cost-effective way to turn ideas into crisp, repeatable prints on tees, totes, posters and more. Whether you’re exploring what stencilling is or comparing it with screen printing stencils. You can create with confidence from first sketch to final stencil.
Fast Quote Response Free Expert Advice Get a Fast Quote Now Contact Sales

What is Stencil Printing:
Stencil printing could be compared with screenprinting in that only your design will be visible and a different material will be used to block out the areas which you do not want to be seen. Both methods follow the process of applying ink or paint through an open area and onto a substrate.
In screen printing, a treated screen is exposed to UV light which means the ink will only go through the area of the custom logo or design. This requires a relatively expensive set-up and expertise in the process. Stencil printing, on the other hand, can be done using a home printer, a cutter, paper or card and some imagination! stencillin, it is broken down below, and it is a fun and easy way to get started with custom designed prints.
The Stencil Printing Process:
1. Make your design
Create your design using a graphics package, for example, Photoshop or Illustrator (Word will work for simple designs and text!). Compare the size of the design with the surface area you will be printing on and size it accordingly. Some examples or ideas you could do would be custom printed t-shirts, custom printed backpacks, posters, walls, the possibilities are endless!
2. Print onto thick paper or card
We recommend printing the design in black and white so you can better identify the areas that you will need to cut out. Ideally, if your printer allows, you want to print stencils onto thick paper, card or poster board. This will allow you to re-use your stencil and make it easier for you to cut it out. Using a printer stencil makes this even easier if you plan to repeat the design.

3. Cut-out the design
In Stencil Printing the white part of the stencil is called the positive whilst the black part is called the negative. Using a blade or a cutter, cut out the black part of the design or the negative so you are only left with the positive. You need to try to cut in an unbroken line and follow the perimeter. If you have a complicated design then you may have to be creative and use some extra lines to make sure you don’t lose any details. This is an essential step in how to create screen printing stencils or even how to make a stencil for silk screen printing.
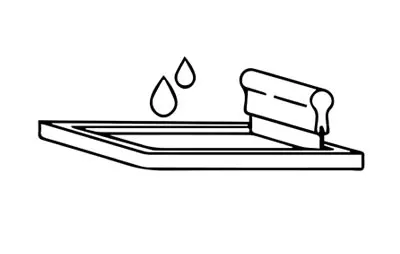
4. Get creative
Once you have your stencils (positive and negative) then you are ready to get creative and begin printing with stencils . Simply place the stencil in the position you want and fix it down with some tape. We recommend putting some cardboard underneath the area you are going to print so you are printing onto a hard and flat surface.
You can now experiment with letter stencil print ideas, try 3D print stencil methods for texture, or even look into how to make a screen printing stencil for more intricate designs. Advanced users may want to explore silk screen printing stencils, stencil screen print tools, or learn how to make a screen printing stencil with different materials like acetate or mylar.

Comparing Stencil Printing, Screen Printing and DTG Printing Methods
Different techniques are used to print designs onto garments, depending on the design complexity and order size. Some methods are simple and mainly used for DIY or craft printing, while others are professional techniques used in commercial garment production. Below is a comparison of stencil printing, screen printing and DTG printing.
DTG Printing
A specialised printer applies water-based ink directly onto the fabric.
Allows full-colour designs, gradients and photographic detail in one print.
Requires minimal setup, making it perfect for small runs and custom orders.
Commonly used for personalised clothing and print-on-demand production.
Screen Printing
Ink is pushed through a mesh screen where the design has been prepared using a stencil or emulsion.
Each colour requires a separate screen for accurate layering.
Produces vibrant, durable prints that last through many washes.
Ideal for bulk orders such as company uniforms, event merchandise and promotional clothing.
Stencil Printing
A design is cut into a stencil sheet and ink or paint is applied through the cut-out areas onto the fabric.
Best suited for simple shapes and single-colour designs.
Primarily a handmade or home printing technique, not commonly used in industrial garment production.
Often used for crafts, DIY projects, and street art rather than professional clothing manufacturing.
Your Order, Made Easy in 4 Steps

1. Tell us about your project needs
Share your requirements, quantities and deadlines with our team so we can recommend the best solution.
2. Expert advice & visual mock-ups
We recommend the best products and printing methods, then provide mock-ups for approval before production.

3. Production & Quality control
Your order is produced using professional printing and checked at every stage to ensure quality.

4. On-time delivery, every time
We deliver your order on time to offices, events and venues across the UK and worldwide.
Need Expert Advice?
Fill in the details below and our team will get back to you shortly.

Check Out Prices & Artwork Guidelines for our Printing Techniques
Explore printing prices and artwork guidelines — everything you need to get started with confidence, backed by expert support when you need it.
Printing Prices Artwork GuidelinesAdvanced Screen Printing Effects & Finishes - Screen Printing Techniques
Our advanced screen printing effects and finishes create a wide range of visual and tactile results — from ultra-soft prints and subtle tonal designs to bold textures and eye-catching finishes.
Our team recommends the best approach based on your artwork, garment choice and brand goals, considering colour count, durability, feel and budget to achieve the best result for your project.


More Garment Printing Techniques Explained
Looking for the best printing method for your design and garment choice? At Garment Printing, we offer a wide range of professional printing techniques to suit every style, budget and project requirement. Whether you need vibrant full-colour detail, fast turnaround or eco-friendly options, our team has the expertise to deliver. Explore the techniques below and find the right solution for your next project — we’re here to guide you every step of the way.


Frequently Asked Questions About Stencil Printing
Find quick answers to our most common questions about Stencil Printing
Our wholesale solutions are ideal for brands, marketing agencies, resellers, event organisers, corporate buyers and businesses needing regular bulk orders.
Minimum quantities vary depending on the product and printing method, but wholesale pricing is designed for medium to large volume orders.
Yes. Pricing improves as order quantities increase, making wholesale printing the most cost-effective option for large projects and repeat orders.
Yes. Many clients use us as their long-term production partner for repeat clothing and merchandise orders.
Yes. We can ship orders to single or multiple addresses across the UK or internationally, including direct delivery to stores, offices or event locations.
Yes. We offer additional services including custom labelling, relabelling, tagging and personalised packaging for wholesale clients.
Production time depends on product type, quantities and printing method, but our team will advise on the fastest and most reliable turnaround for your order.
Absolutely. Our experts will recommend the most suitable printing technique based on garment type, design, durability requirements and budget.

Let’s Talk About Your Next Project
At Garment Printing, we support you from product selection to production and delivery. Share your requirements and timelines, and our team will guide your project from start to finish.
Get a Fast Quote